I remember the exact moment I realized my monitor was subtly sabotaging my photo edits. The colors looked dull, contrast was off, and I kept wondering why my meticulously crafted images didn’t pop like they did on other screens. It was a frustrating cycle—spending hours trying to tweak settings, only to end up with visuals that looked different across various devices. That lightbulb moment hit me hard: my monitor wasn’t properly calibrated.
If you’ve ever stared at your screen feeling like the colors are washed out or that your work doesn’t look quite right, you’re not alone. Monitors, especially those with IPS panels, can be deceptively tricky to set up perfectly. Despite their reputation for vibrant images and consistency, they still require proper calibration—something many overlook.
Today, I promise to guide you through the seven essential steps to calibrate your IPS monitor effectively for 2026 photo editing. Whether you’re a professional photographer, a digital artist, or a serious hobbyist, these steps will help ensure your monitor displays accurate colors, sharp details, and smooth gradations that match your creative vision.
Why Your Monitor Calibration Could Make or Break Your Photo Work
Imagine spending hours editing a stunning landscape, only to see it look dull and lifeless on your client’s monitor or a different device. This disconnect isn’t just frustrating; it can undermine your confidence and lead to costly re-edits. Accurate calibration guarantees that what you see on your screen is a true representation of your work—crucial for maintaining color consistency across all your projects.
Incorrectly calibrated monitors are one of the most common pitfalls for digital creatives. In fact, a survey from [Color Management Consortium](https://www.color.org/) reveals that nearly 70% of digital artists struggle with inconsistent colors due to improper monitor calibration. It’s no wonder that investing time in calibration can significantly boost your productivity and reliability.
But let me be clear: calibration isn’t just about sliders and software—it’s about understanding your workspace, lighting, and hardware. I made early mistakes, like relying solely on default factory settings or ignoring ambient light, which only confused my color profiles further. Once I grasped the importance of a systematic calibration process, everything changed.
So, if you’re tired of second-guessing your edits or feeling like your monitor is holding back your creative potential, you’re in the right place. In the following sections, I’ll walk you through each practical step to achieve a perfectly calibrated IPS monitor in 2026, setting you up for consistent, beautiful results every time.
Ready to transform your display into a true color haven? Let’s dive into the first step that will make your monitor calibration journey seamless and effective.
Setting the Stage with Proper Hardware Connection
Before diving into calibration, ensure your monitor is properly connected to your computer with a high-quality cable, preferably DisplayPort or HDMI 2.1, which support higher bandwidth and color depth. Avoid using adapters or daisy-chaining multiple monitors, as these can introduce color inconsistencies. I remember when I first tried calibrating my IPS monitor using a VGA cable—it resulted in washed-out colors and incorrect gamma. Switching to a direct HDMI connection instantly improved my starting point.
Adjusting Basic Look and Feel
Start with factory settings—set brightness to around 120 cd/m², contrast to 70-80, and color temperature to ‘User’ or ‘Custom’ mode if available. For light-controlled environments, a lower brightness reduces eye strain; for bright rooms, increase it slightly. I once neglected this step, and my photos looked vibrant during calibration, but the next day in daylight, the colors seemed dull. Getting these basics right creates a solid foundation for fine-tuning.
Using Built-In Display Settings to Fine-Tune
Access your monitor’s on-screen display (OSD) menu. Locate options like ‘Gamma,’ ‘Gain,’ ‘RGB,’ and ‘Color Temperature.’ Set gamma to 2.2, which is standard for photo editing, and adjust RGB sliders to balance overall ‘white’ without color cast. For example, I initially set my red too high, resulting in warmer tones that skewed my skin color tests. Adjusting RGB in small increments ensures more accurate results.
Employing Calibration Tools and Software
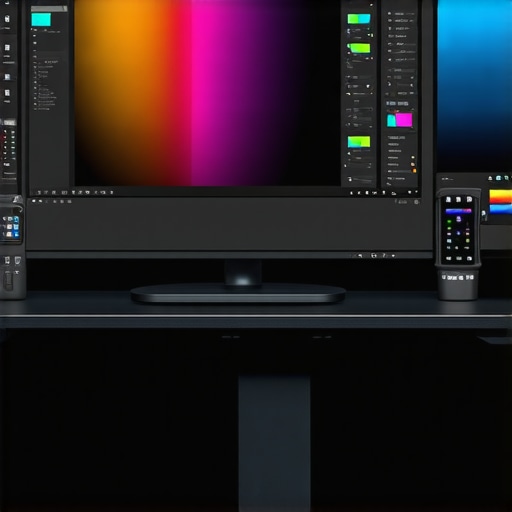
Invest in a colorimeter like the X-Rite i1Display Pro or Minolta CA-410. Connect the device and run calibration software such as DisplayCAL or X-Rite’s i1Profiler. For my setup, using DisplayCAL revealed a mismatch in color profile, prompting me to create an ICC profile that I could assign as default. The process involves placing the device on your screen, letting it scan color patches, and generating an accurate profile within minutes. This step is critical for consistent color fidelity across various editing sessions.
Creating and Applying Accurate Color Profiles
Once calibration completes, save the ICC profile and set it as your default in your operating system’s display settings. On Windows, navigate to Display Settings > Advanced Display Settings > Color Management; on Mac, go to System Preferences > Displays > Color. Applying the profile ensures your system uses the precise color data during editing. I once forgot to apply my ICC profile, and subsequent exports appeared off on other devices. Proper profile application guarantees your edits translate reliably everywhere.
Adjusting Ambient Environment for Consistency
Ambient lighting greatly influences perceived colors. Use soft, neutral lighting with minimal glare and avoid direct sunlight illuminating your monitor. Implementing a consistent workspace with controlled lighting reduced my color discrepancies during calibration. Consider using a lightbox or neutral wall paint to prevent reflections and color casts that can throw off calibration. Remember, calibration isn’t about just the monitor—it’s about the entire environment.
Re-Calibrating Regularly for Peak Accuracy
Calibration isn’t a one-and-done task. Set a reminder every four to six weeks to re-calibrate, especially if you notice shifts in color or brightness. Monitors can drift over time, especially with prolonged use. I learned this the hard way when my photos started looking different after a month—recalibrating restored consistency. Keeping your calibration routine frequent ensures your edits always match your creative intent.
When it comes to choosing a monitor, many enthusiasts and professionals rely on common myths that can sabotage their experience. For example, the belief that a higher refresh rate always equates to better gaming performance isn’t true without considering other factors like response time and synchronization technologies. In reality, many gamers chase 240Hz or 360Hz panels, but fail to realize that for casual play or work productivity, 144Hz often offers a perfect balance of smoothness and affordability, especially when paired with the right settings and hardware. Relying solely on refresh rate as a performance metric overlooks the importance of pixel response and input lag, which are equally critical for gaming accuracy and fluid visuals. Interestingly, some assume that IPS monitors are only for color accuracy and neglect their fast response times, leading to misconceptions about ghosting or motion blur. Advances in IPS technology now deliver high refresh rates with minimal artifacts, but only if calibrated properly and paired with suitable gaming settings. A common trap is thinking that all gaming monitors are optimized right out of the box, but many require manual tweaks to achieve optimal performance—such as adjusting overdrive settings or enabling G-SYNC/FreeSync. Overlooking these nuances can result in less responsive gameplay or eye strain during long sessions. For work environments, some assume that 60Hz is sufficient for all tasks, yet professionals editing videos or engaging in detailed design benefit significantly from 144Hz displays that reduce eye fatigue and improve overall efficiency. A hidden nuance is how ambient lighting and monitor calibration impact perceived image quality more than hardware specs alone; a poorly calibrated IPS panel can look washed out or overly contrasty despite high specs. For advanced users, understanding the intricate trade-offs between TN, VA, and IPS panels is vital; for instance, VA panels might offer better contrast but at the cost of higher input lag, which is critical for competitive gaming. Myths aside, the latest studies from experts like NVIDIA’s visual tech team emphasize that the holistic experience involves calibration, hardware synergy, and environment tailoring. To avoid common pitfalls, explore dedicated sources on calibration techniques and monitor reviews—like those found in comprehensive guides for 2025, which explain how to get the most out of your display investments. Have you ever fallen into this trap? Let me know in the comments, and stay tuned for more deep dives that will help you optimize your setup for both work and play.Keeping your high-performance monitors in top shape requires the right tools and disciplined maintenance routines. Personally, I rely on a combination of hardware calibration devices and software solutions to ensure ongoing accuracy. The X-Rite i1Display Pro remains my top choice because of its precision and ease of use; it’s excellent for regularly recalibrating my IPS and gaming monitors, especially as I switch environments or lighting conditions change. Additionally, I utilize DisplayCAL—an open-source calibration software that offers advanced control over color profiling, enabling me to fine-tune my display for both photo editing and gaming without sacrificing accuracy.
Regular cleaning is equally vital. I recommend using a microfiber cloth and screen-safe cleaning solutions to prevent dust and smudges that can affect calibration results. For stubborn fingerprints or streaks, a solution with a little distilled water or a dedicated monitor cleaner works wonders, and always apply the cleaner to the cloth, not directly on the screen.
Forecasting future trends, I believe calibration tools will become increasingly integrated with AI-assisted adjustments, making ongoing maintenance more seamless. Imagine software that automatically detects shifts in color or brightness and calibrates in real-time, saving hours of manual work.
How do I maintain my monitor calibration over time?
In my experience, establishing a weekly calibration routine using a hardware device like the i1Display Pro keeps things consistent. Also, ensuring your ambient lighting remains stable helps prevent colors from appearing off due to fluctuating light levels. Alongside physical maintenance, I keep my system’s graphics drivers and monitor firmware up to date. Firmware updates often include improvements for color accuracy and feature enhancements—check with your monitor manufacturer’s support page or contact [SmartScreen Showcase](https://monitors.smartscreenshowcase.com/contact-us) for the latest updates.
For busy creators and gamers, I recommend setting a recurring reminder—say, every four weeks—to recalibrate. This ensures that drift or gradual changes in your monitor’s hardware do not compromise your visual fidelity or gaming responsiveness.
Finally, investing in a high-quality VESA mount, as discussed in [this guide](https://monitors.smartscreenshowcase.com/ditch-the-stand-5-vesa-mount-fixes-for-2026-work-monitors), allows you to position your monitor perfectly, reducing glare and reflections that can skew your perception of colors over time.
By integrating these tools and practices into your routine, you’ll sustain the vibrant accuracy of your IPS and gaming monitors, maintaining peak performance for work and play. Make it a habit to recalibrate regularly—your eyes and your projects will thank you.
Lessons That Changed My Perspective on IPS Monitors
One of the most eye-opening lessons I learned was that factory calibration can be deceptive; trusting initial settings without proper calibration can lead to color mismatches and frustration. I also discovered that ambient light plays a critical role—what looks perfect in a dim room can seem washed out in daylight, emphasizing the importance of environment adjustments. Moreover, I realized that even the best IPS monitors need regular recalibration; my color profiles drifted over time, subtly affecting my work. Finally, I found that investing in quality calibration tools not only saves time but elevates the entire creative process, turning a good monitor into an invaluable asset.
My Go-To Resources for Mastering Monitor Calibration
My top recommendation is this comprehensive guide which breaks down calibration techniques specifically for IPS panels, providing both beginner tips and advanced tricks. I rely on the best monitors for creatives list to select dependable hardware that works seamlessly with calibration tools. For hands-on calibration, the expert-explained articles offer personal insights and practical solutions. These resources consistently help me stay ahead in achieving true-to-life color accuracy.
Gear Up for Success: What’s Next in Visual Calibration
Don’t underestimate the power of a well-calibrated monitor—it’s your secret weapon for consistent, high-quality work and gaming immersion. Start by integrating regular calibration routines into your schedule and invest in reliable tools to keep your display in top form. Remember, your environment plays a pivotal role, so optimize lighting conditions to reduce glare and reflections. The future of monitor calibration will only grow smarter—imagine AI-assisted adjustments that do the hard work for you, leaving more time for your creative pursuits. Embrace these practices now, and elevate your visual experience to extraordinary levels.
Have you ever overlooked the importance of calibration tools or environment tweaks? Share your experiences below—I’d love to hear how calibration has transformed your workflow or gaming performance!
,
![7 Best 144Hz Gaming Monitors Under $300 [2026 Tested Results]](https://monitors.smartscreenshowcase.com/wp-content/uploads/2026/03/7-Best-144Hz-Gaming-Monitors-Under-300-2026-Tested-Results.jpeg)

Leave a Reply