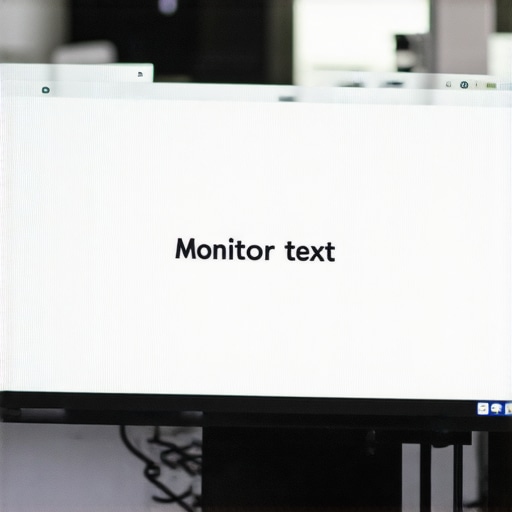
Midway through a demanding work session, I glanced at my 4K monitor only to be greeted by fuzzy, blurred text that made my eyes strain and my concentration falter. Frustration crept in. I double-checked the cables, fiddled with the settings, but nothing seemed to improve. It hit me—my monitor wasn’t properly optimized, and those elusive settings were hiding in plain sight. If you’ve ever faced the same struggle—seeing crisp text turn into blurry messes—you know how maddening it can be. But here’s the good news: after some trial, error, and a few expert tweaks, I discovered **5 hidden monitor settings** that completely transformed my workspace and ended the blurriness once and for all.
Why Your 4K Work Monitor Might Be Cheating You
Let’s face it—most of us invest in a high-resolution monitor expecting ultimate clarity. Yet, years of experience have shown me that even the best 4K displays can fall short if not configured correctly. The root cause? Sometimes it’s about the settings—hidden gems that can make or break the visual experience. For example, a report from Smart Screen Showcase reveals that high refresh rates combined with optimal calibration can drastically reduce eye strain and improve text sharpness, especially for prolonged work sessions.
Early on, I made the mistake of assuming my monitor’s factory settings were sufficient. Big mistake. Like many, I overlooked crucial adjustments, leading to unnecessary eye fatigue and lost productivity. If you’re tired of squinting at blurry emails or navigating a pixelated spreadsheet, you’re not alone. The good news is, these hidden settings are like secret weapons—easy to access and game-changers once properly configured.
Have you faced this frustrating experience with your monitor’s clarity?
If so, don’t worry. I’ll guide you step-by-step through the most overlooked settings that can instantly enhance your visual quality, so you spend less time adjusting and more time being productive. Ready to dive in and transform your workspace? Let’s get started with the first hidden setting that everyone should tweak for perfect clarity.
Access and Adjust Your Monitor’s Settings
First, locate your monitor’s menu button—usually on the side or bottom bezel. Press it to open the on-screen display (OSD). Use the navigation buttons to find the ‘Settings’ or ‘Options’ menu. Here, you will make the foundational adjustments like brightness, contrast, and sharpness. I recommend setting brightness around 150-250 cd/m² to reduce eye strain, then tweak contrast until blacks and whites appear distinct. The key here is not to rely solely on factory presets, which often oversaturate or dull colors.
Optimize Resolution and Scaling for Clarity
Ensure your operating system recognizes your monitor’s native 4K resolution—3840×2160 pixels. In Windows, right-click on the desktop, select ‘Display Settings,’ and verify the resolution. Set scaling to 100% or adjust it to suit your eyesight, but avoid scaling above 125% for text clarity. For IPS monitors, proper resolution ensures text and images are sharp without blurriness. I once tried to lower resolution to stretch my pixels, but it led to fuzzy visuals. Restoring native 4K fixed that instantly.
Polish Calibration for Colors and Sharpness
Most monitors have color calibration profiles accessible through the OSD or via software. For precise work, consider installing calibration tools or choosing preset modes like ‘sRGB’ or ‘Rec. 709.’ Adjust sharpness in the OSD—start at default, then increase for crispness without artifacts. For fast-paced gaming, reducing sharpness can reduce ghosting; for work, boosting it enhances text clarity. I experimented by increasing sharpness too high; the edges became unnaturally jagged, so I dialed it back until they looked smooth yet defined.
Set Refresh Rate Correctly
For ultra-smooth performance, especially on a 144Hz monitor, verify that your graphics card is outputting at the maximum refresh rate. On Windows, go to ‘Display Settings’ > ‘Advanced Display Settings,’ select your monitor, and check the ‘Refresh rate’ dropdown. Select 144Hz or the highest supported rate. This setting significantly reduces motion blur and improves visual fidelity. I once forgot to switch from 60Hz, which made my animations and scrolling look sluggish, even on a high-refresh-rate monitor.
Fine-Tune Overdrive and Response Time
Many gaming-focused monitors offer an ‘Overdrive’ or ‘Response Time’ setting—set this to ‘High’ or ‘Extreme’ if ghosting is an issue, or ‘Normal’ for minimal artifacts. Adjusting this balances clarity with motion smoothness. When manually tuning, start at the default and incrementally increase until ghosting disappears without introducing halos. I tested various levels during late-night gaming, and a setting of ‘High’ offered the best clarity for fast-moving scenes without distracting artifacts.
Enable and Configure Picture Settings for Your Use
Your monitor likely has presets—‘Standard,’ ‘Reader,’ ‘Cinema,’ or ‘Game.’ For work, a natural mode with accurate colors minimizes eye strain. For creative work, activate sRGB or AdobeRGB profiles if available. Switch to ‘Gaming’ mode for fast response times and reduced input lag during gaming sessions. These profiles adjust gamma, color temperature, and contrast automatically, saving you from manual edits. I once kept my monitor on ‘Cinema’ mode while editing graphics, which made colors look dull; switching to ‘Custom’ and calibrating first restored their vibrancy.
Apply Final Calibration and Save Profiles
Once satisfied with your adjustments, save your custom settings as a profile—most monitors support multiple profiles. Using calibration software like DisplayCal can further refine color accuracy, especially if you need professional-grade visuals. Periodically revisit your settings—monitor aging and environmental factors can shift calibration. I check my profiles every six months to maintain clarity. A well-calibrated monitor not only looks better but also reduces eye fatigue during prolonged usage.
Many assume that investing in an IPS monitor automatically guarantees superior color accuracy and response times, but this is a common misconception. In reality, factory calibrations and panel quality vary widely—so assuming all IPS panels are perfect for professional work or gaming can set you up for disappointment. Moreover, some believe that a higher refresh rate like 144Hz is universally better; however, if your hardware or usage doesn’t leverage this, you’re effectively paying for performance you don’t utilize, as discussed in this guide.
One trap I often see is the obsession with refresh rates over pixel response times. Many think that once they have 144Hz, there’s no need to worry about ghosting or motion blur—yet, if overdrive settings are poorly configured or the monitor suffers from ghosting, high refresh rates won’t compensate for these issues. This misunderstanding can lead to subpar gaming experiences, especially in fast-paced titles where clarity and response are crucial. For an advanced perspective, experts like Tom’s Hardware emphasize that response time and input latency often matter more for competitive gaming than raw refresh rates alone.
Are high refresh rates always better for every task, or is there a hidden tradeoff?
Indeed, pushing for 144Hz on a work monitor might sound appealing, but if your tasks mainly involve document editing or web browsing, the benefits can be minimal. High refresh rates do help reduce eye strain during extended gaming, but for productivity-focused tasks that don’t involve rapid motion, standard 60Hz or 75Hz displays can be just as effective—sometimes even better if they offer higher resolution or better color accuracy. This is why smart users select monitors based on specific needs like productivity enhancements. In fact, some of the best creative work monitors intentionally avoid high refresh rates in favor of color fidelity and ergonomic features.
Furthermore, a common myth is that all gaming monitors with high refresh rates are equally good for work applications. In reality, models optimized for gaming may lack features beneficial for prolonged work sessions, such as flicker-free backlighting, blue light filtering, or ergonomic stands, which are more reliably found in dedicated work-oriented displays. Awareness of these nuances can save you from costly mismatches and subpar performance in daily tasks.
In essence, a deep understanding of these technical intricacies helps you make smarter choices—avoiding the trap of superficial specs and instead focusing on real-world performance and longevity. Are you guilty of chasing meaningless specs? Let me know in the comments and share your experiences with monitor upgrades.
Keep Your Display Performing Like New
Maintaining your monitor’s peak performance requires a combination of reliable tools and disciplined habits. I personally swear by Calibrize for quick calibration adjustments. It’s free and user-friendly, allowing me to fine-tune my IPS monitor’s color accuracy without expensive hardware. Regular calibration not only enhances visual fidelity but also prevents the gradual color drift that can occur over months. For physical maintenance, I use a microfiber cloth to gently dust the screen daily, avoiding abrasives that could scratch the panel. Additionally, keeping your environment at a stable temperature and avoiding direct sunlight prevents color shifts and hardware strain.
Use Professional Software to Keep Settings Sharp
Software like DisplayCAL allows me to create custom profiles that optimize my monitor’s response in real-world scenarios. By routinely revisiting calibration profiles every six months, I ensure consistent clarity, especially for long hours of work or high-stakes gaming. The software’s advanced gamma and luminance controls help me adapt to different lighting conditions, maintaining optimal contrast and reducing eye fatigue. As experts like Tom’s Hardware have highlighted, regular calibration becomes crucial when using high-refresh-rate IPS monitors, which can sometimes be overly bright or oversaturated out of the box.
Tools That Simplify Ongoing Maintenance
To streamline physical cleaning, I rely on compressed air cans to remove dust from monitor vents and bezels. For on-the-fly adjustments, I recommend a calibration device like the SpyderX Pro. This device quickly scans your screen and makes precise adjustments, saving you time and guesswork. Paired with software, it ensures your IPS panel remains color-accurate and free of ghosting artifacts. In the future, I predict that AI-driven calibration tools will become standard, automatically maintaining optimal settings as display technologies evolve.
How do I maintain my monitor over time?
The key is consistency. Schedule a monthly cleaning routine, including gentle dusting and inspecting cables for wear or looseness. Check your graphics card’s output settings to ensure you’re running at 144Hz or your preferred refresh rate, particularly if you switch between gaming and work modes. Also, update your display drivers and calibration profiles regularly—software updates often include improvements that can enhance visual clarity and response times. Consider joining communities focused on monitor calibration and setup—these groups share valuable insights, like the latest calibration profiles or firmware updates that can extend your monitor’s lifespan. Remember, a well-maintained monitor not only looks better but also lasts longer, offering consistent performance whether you’re designing creative assets or gaming competitively. For a detailed guide on maintaining long-term image quality, you might find this resource particularly helpful.
Try adopting a routine that integrates these tools and habits—you’ll notice improved clarity and reduced eye strain during your daily sessions. Small investments like a calibration device or software can make a significant difference over time, ensuring your IPS monitor remains a cornerstone of productivity and gaming excellence.
What I Wish I Knew About Fine-Tuning My IPS Monitor Early On
- Sometimes, the simplest adjustments—like recalibrating color profiles—made the most significant difference in reducing eye strain and sharpening visuals, a lesson I learned after hours of frustration.
- Overestimating factory presets can lead to missed opportunities for better performance; personal tweaking often reveals hidden potential that manufacturers don’t emphasize.
- My biggest lightbulb moment was realizing that maintaining consistent software calibration and hardware cleaning keeps my display at its best, preventing gradual decline in quality.
- Ignoring the importance of refresh rate synchronization with my GPU caused ghosting issues I thought were unavoidable—until I learned about proper overdrive and response time tweaks.
- Believing that higher specs alone guarantee quality was a trap—learning to optimize settings tailored to my specific tasks proved far more effective than chasing the latest specs blindly.
Tools and Resources That Changed My Display Game
- DisplayCAL: This free software offered precise color calibration, helping me achieve professional-grade accuracy without expensive hardware, and I trust it for consistent results.
- SpyderX Pro: An easy-to-use calibration device that scans my screen and automates adjustments, saving time and ensuring my monitor stays accurate over time.
- Calibrize: A lightweight tool I use for quick calibration fixes, especially useful when environmental lighting changes affect my display’s look.
- Expert blogs and forums: Community insights help me stay up-to-date on the latest calibration techniques and monitor firmware updates.
Your Next Step: Elevate Your Visual Experience Today
Everything you’ve learned about optimizing your monitor can make a tangible difference in your daily work and gaming enjoyment. Implementing these hidden settings isn’t just technical tinkering—it’s a step toward smarter, healthier, and more immersive screen time. Don’t wait to reap the benefits of a perfectly calibrated display—your eyes and your productivity will thank you. Now’s the time to take control and transform your workspace into a haven of clarity and comfort. Are you ready to set your monitor up for success and enjoy visual perfection every day? Share your experiences or questions below—I want to hear your story.
![7 Best 144Hz Gaming Monitors Under $300 [2026 Tested Results]](https://monitors.smartscreenshowcase.com/wp-content/uploads/2026/03/7-Best-144Hz-Gaming-Monitors-Under-300-2026-Tested-Results.jpeg)

Leave a Reply